
Brine & wet cure calculator
Wet-Cure Bacon Calculator
The wet-cure route to streaky, back or loin bacon: an equilibrium brine dosed against the total brine weight, so it cannot over-salt. Cure #1 is built in, because bacon must always be cured.
Calculate your wet-cure bacon
Cure, salt and sugar for an equilibrium brine, against the total brine weight
Purpose and scope
The recipes published on The Curesmith are intended for educational and informational purposes only. Meat curing, fermentation and smoking involve processes that, if carried out incorrectly, can result in products that are unsafe to eat. By using any recipe on this website you acknowledge that you do so entirely at your own risk, and you agree that The Curesmith and its authors cannot be held liable for any outcome arising from its use.
Limitation of liability
The Curesmith and its authors accept no responsibility or liability for any illness, injury, loss or damage arising from the use of these recipes, including but not limited to illness caused by improperly cured, handled or cooked meat products, errors in measurement or technique, equipment failure, or deviation from the stated method or quantities.
Nitrite and cure safety
Meat curing involves the use of nitrite salts, which must be measured accurately and used strictly according to the quantities specified. Nitrite in excessive quantities is toxic. Please ensure you understand the following before proceeding:
- Always use a calibrated digital scale accurate to at least one gram. For smaller batches, a scale accurate to 0.1g is strongly recommended.
- Never exceed the stated cure amounts. Never substitute cure types without recalculating.
- Store all curing salts clearly labelled, separately from regular salt, and out of reach of children.
- Different cure products have different nitrite concentrations. Always check your manufacturer's label and adjust quantities accordingly.
Food hygiene and cross-contamination
Raw and cured meat products must be stored, handled and prepared in a clean environment using food-safe equipment. Hands, surfaces, tools and containers must be thoroughly cleaned and where appropriate sanitised before use. Cross-contamination between raw meat and ready-to-eat products must be avoided at all times.
Temperature control
Temperature control is critical throughout all curing and smoking processes. Inadequate temperature management can allow the growth of dangerous pathogens including Clostridium botulinum, Listeria monocytogenes, Salmonella and E. coli. A reliable refrigerator thermometer and a calibrated probe thermometer are essential pieces of equipment for anyone producing cured or smoked meat at home.
Uncooked cured products
Whole muscle products that are eaten without cooking, such as air-dried bresaola, coppa or prosciutto, must reach their target weight loss before consumption. Products that have not been cured and dried to the correct specification may not be safe to eat uncooked. Pancetta and guanciale cured to less than 38% weight loss must not be consumed uncooked.
Bacon and other uncooked cured products
Bacon and other uncooked cured products must be cooked thoroughly before eating. Cold smoking adds flavour and colour but does not cook the product. A cold-smoked bacon or sausage remains a raw product and must reach a safe internal temperature before it is safe to consume. For pork and beef this is 72°C / 162°F. For poultry this is 74°C / 165°F.
When in doubt, seek professional guidance
If you are unsure about any aspect of the curing, smoking or fermentation process, we strongly encourage you to seek formal training or guidance from a qualified food safety professional before proceeding. The information on this website is not a substitute for proper food safety education and training.
Commercial production
These recipes are produced for home and small-scale producers. They are not intended for commercial food production. Commercial meat processing is subject to regulatory requirements that vary by country and jurisdiction. If you intend to produce cured or smoked products for sale, you must ensure full compliance with all applicable food safety regulations in your region.
Weigh the water. Auto-matched to the meat as a starting point.
Cure type required for wet-cured bacon
Cure composition
Check manufacturer's label.
Over the total brine. Standard max 156 ppm.
Salt & sugar
Typical 2.0 to 2.5% of the total brine.
Curing time estimator
Measured at the thickest cross-section.
Additional ingredients optional, % of total brine
Cold smoking optional
Cold smoking adds flavour and colour but does not cook the bacon. Toggle on to include smoking guidance in your results.
Brine formulation
Nitrite safety check
Brining
Cold smoking guidance
Calculator by The Curesmith — thecuresmith.com
Wet-cure bacon tips
About wet-cure bacon
Wet-cured bacon is a great way to produce evenly cured, flavourful bacon, but the balance of water, salt, cure, sugar and seasonings needs to be calculated properly. This calculator helps you build an accurate wet cure based on the combined weight and formulation of your batch, making it easier to create safe, consistent bacon with confidence. Whether you are preparing a simple traditional brine or a more customised cure with added sweetness, aromatics or spices, the calculator gives you a clear, repeatable recipe you can print and use again. Please read the health and safety notice carefully before using this calculator, and always follow proper curing practices throughout.
Additional important information
What Is Wet Cure Bacon?
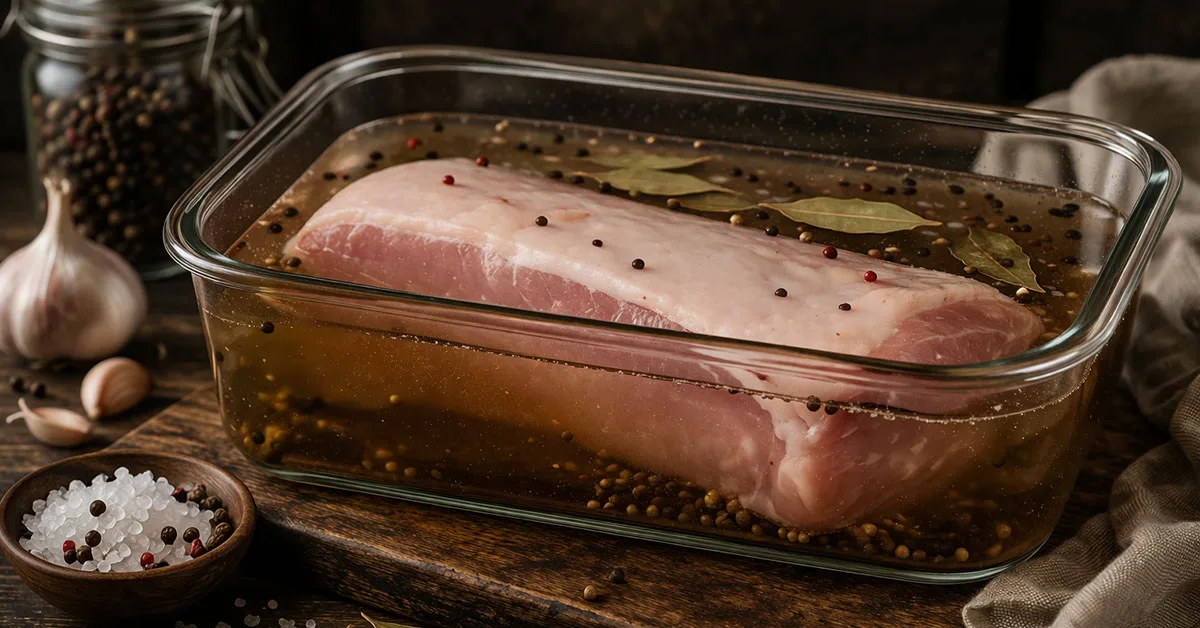
Wet cure bacon is made by submerging a piece of pork in a seasoned brine, a solution of water, salt, curing salt and sugar, and leaving it to cure in the refrigerator for a number of days. Unlike dry curing, where ingredients are applied directly to the surface, immersion brining surrounds the meat completely. The salt, cure and flavourings migrate inward from every surface at once, driven by the difference in concentration between the brine and the meat itself.
It is a forgiving and accessible method, well suited to home curers who are new to bacon making. The brine is easy to prepare, the ingredients are straightforward to weigh, and the process is largely hands-off once the meat is in the vessel. The result is a bacon that is evenly seasoned, moist and mild, different in character from dry-cured bacon, but excellent in its own right.
The cuts that respond best to wet curing are those with a relatively even thickness and good fat cover: streaky belly, back loin and Canadian-style loin are all well suited to the method. Each produces a different eating experience, which is why the calculator includes specific presets for each one.
How Wet Curing Works
The science behind wet curing is straightforward. When meat is submerged in brine, the high concentration of salt and cure outside the meat creates a gradient that draws these compounds inward through the muscle fibres. This process, osmosis and diffusion, continues until the concentration inside the meat approaches that of the surrounding brine. The result is a piece of meat that has absorbed a meaningful quantity of salt and cure throughout its thickness.
This is an important point: the meat does not absorb the entire brine, and the nitrite level in the finished bacon will always be lower than the concentration in the brine itself. The ppm figure shown by the calculator represents the nitrite level in the brine, not in the meat. This is the standard method for calculating wet cure safety and is consistent with regulatory practice, but it means the actual nitrite uptake into the meat will be somewhat lower than the stated figure.
The efficiency of cure uptake depends on the thickness of the meat, the brine concentration, the temperature, and how well the meat is kept submerged and agitated. This is why daily flipping and consistent refrigeration temperatures matter, they are not optional extras, they are part of the process.
Total Brine Weight, Why It Matters
In wet curing, all percentages for cure, salt and sugar are calculated against the total brine weight, that is, the combined weight of the meat and the water together. This is the standard method for immersion brine calculations and is used by professional charcutiers worldwide.
The reason for this is that the meat itself forms part of the system. As the brine acts on the meat, water and solutes move in both directions across the meat surface. The total brine weight represents the entire mass that these ingredients are distributed across, giving a more accurate picture of the final concentration the meat is exposed to.
This means that if you change either your meat weight or your water weight, the amounts of cure, salt and sugar will all change too. The calculator handles this automatically, but it is important to understand the principle when you are interpreting your results or scaling a recipe.
Weigh your water. Do not measure it by volume. One litre of water weighs approximately 1000 g at room temperature, but using a scale is always more accurate and ensures your brine concentration is exactly what the recipe specifies.
Salt Levels and Brine Concentration
Salt in a wet cure brine serves two functions: it seasons the meat and it contributes to the preservation environment. The salt percentage is expressed as a percentage of total brine weight (meat plus water), and the resulting brine concentration, the effective percentage of salt dissolved in the water phase, is shown separately in the results.
The brine concentration figure shown in the results reflects the effective salt level in the water phase and gives you a useful reference point when comparing recipes. A typical wet cure bacon brine sits at around 5 to 8% salt concentration in the water.
If you are using Nitrite Salt or Coloroso, this product replaces your salt entirely. Do not add additional salt alongside it, the product is the salt.
Cure Types, What to Use and When
Cure #1 is the standard curing salt for wet-cured bacon. It is a pre-mixed blend of salt and sodium nitrite, typically at a ratio of 93.75% salt to 6.25% sodium nitrite. In a wet cure, it is not applied at a fixed rate per kilogram of meat as it is in dry curing, instead, the amount is calculated to achieve a target nitrite concentration in the total brine, expressed in parts per million (ppm).
The standard target is 156 ppm. The regulatory maximum in most jurisdictions is 200 ppm. The calculator allows you to set your own target within this range and will show you the resulting nitrite level alongside a colour-coded safety indicator.
Always check the nitrite percentage on your specific product label before calculating. Most commercial Cure #1 products are 6.25%, but some vary, entering the wrong figure will produce an incorrect cure weight.
Nitrite Salt, sold under brand names such as Coloroso and Savianda depending on your region, is a European-style product in which nitrite is pre-blended into the salt carrier at a typical concentration of around 0.6%. Because this product is the salt itself, it replaces your regular salt entirely and the calculator hides the separate salt field when this option is selected.
As with Cure #1, the amount is calculated to hit a target ppm in the total brine. Always confirm the exact nitrite percentage on your product label and enter it into the calculator before proceeding, this figure varies between manufacturers and getting it wrong will affect both your safety calculation and your seasoning level.
Cure #2 contains both sodium nitrite and sodium nitrate and is intended for long-duration cured products such as whole muscle hams, coppa and other charcuterie that will dry or cure for more than 30 days. Bacon does not require Cure #2. If you are making a product that will be consumed as bacon, Cure #1 or Nitrite Salt is always the correct choice.
Sugar, Types and Quantities
Sugar in a wet cure brine balances the sharpness of the salt, contributes mild sweetness and complexity, and helps develop the characteristic colour of cooked bacon. It also plays a role in flavour development during cold smoking. Sugar is not essential, but most bacon benefits from at least a small amount.
All sugar percentages are calculated against the total brine weight.
Dextrose is my preferred choice. It is less sweet than regular sugar, ferments more readily if you are planning to cold smoke, and produces a cleaner, more savoury result. A starting point of 0.3 to 0.5% of total brine weight is appropriate for most bacon styles.
Regular sugar (sucrose) can be substituted at a slightly lower rate, around 0.25 to 0.4%. It will produce a marginally sweeter result.
Brown sugar, honey and maple syrup are excellent in flavoured bacon brines and produce a warm, caramel character that pairs particularly well with cold smoking. These can be added as additional ingredients using the flavouring dropdown in the calculator. If using liquid sweeteners, account for the small additional volume they contribute to the brine.
Thickness and Brine Time
The estimated brine time in the calculator is based on the thickness of the meat at its thickest point, not its weight. This reflects the reality of how wet curing works: the brine penetrates from the surface inward, and the time required is determined by the distance it must travel, not the overall size of the piece.
Always measure at the thickest cross-section of the piece. For a pork belly this is typically towards the loin end where the muscle is deepest. For a back loin or Canadian-style piece it is usually the centre of the roll.
The calculator applies a standard formula to estimate the minimum time required for full brine penetration. The result is a conservative estimate, the actual penetration rate depends on the brine concentration, the temperature, the density and fat distribution of the specific cut, and how well the meat is kept submerged and agitated.
When in doubt, give it another day. A piece of bacon left in a well-made brine for an extra day or two will not be harmed, provided the brine is kept cold and the meat remains fully submerged.
Keeping the Meat Submerged
This is one of the most important practical points in wet curing and also one of the most frequently overlooked. Meat floats. Even a heavy piece of belly will ride up to the surface of the brine once fully saturated, exposing part of itself to air. Any surface that is not in contact with the brine will not cure properly, and any surface that breaks above the brine line presents a food safety risk.
Use a weight to keep the meat down. A sealed bag of water placed on top of the meat works well. A small plate weighted with a jar, a clean stone, or a purpose-made curing weight are all acceptable. Whatever you use, check the meat each time you turn it and make sure it is fully below the surface before returning the vessel to the refrigerator.
Keep the vessel covered at all times, both to prevent contamination and to reduce evaporation, which would concentrate the brine over the course of a long cure.
Temperature Control
Wet-cured bacon must be kept at 2 to 4°C throughout the entire brining period without exception. This is not a guideline, it is a food safety requirement. At temperatures above 4°C, pathogenic bacteria can grow in the brine and on the meat surface, regardless of the presence of salt and cure.
Prepare your brine and chill it fully before adding the meat. Never add meat to a warm or room-temperature brine and never brine at room temperature, even briefly.
Check your refrigerator temperature with a calibrated thermometer before you begin. Many domestic refrigerators run warmer than their dial suggests, particularly on upper shelves or in the door. Brine containers should sit on the lowest shelf, where temperatures are most consistent.
If your refrigerator has difficulty maintaining 2 to 4°C with a large liquid-filled container inside it, consider moving the container to a dedicated curing fridge or a cool garage environment during cold months, but only if you can confirm the temperature is within range with a thermometer.
Rinse, Dry and Rest
Once the brine period is complete, remove the bacon from the brine and discard the liquid. Rinse the meat briefly under cold running water to remove surface salt crystals and any residual brine, then pat it thoroughly dry with kitchen paper.
Place the rinsed and dried bacon on a rack, uncovered, in the refrigerator for at least a few hours, ideally overnight. This resting period allows the surface to dry completely and the salt distribution to continue settling toward equilibrium within the meat. It also firms the texture, which makes the bacon easier to slice cleanly.
A dry surface is essential before cold smoking. Smoke does not adhere evenly to a wet surface and the result will be bitter and uneven. Do not rush this step, a proper pellicle, the dry, slightly tacky surface that forms during resting, is the foundation of a good smoked bacon.
Cold Smoking
Cold smoking is optional but adds a depth of flavour and character to wet-cured bacon that is well worth the extra effort. The smoke provides an additional mild preservative effect and contributes the colour and aroma that most people associate with traditionally made bacon.
The essential rule is temperature: keep the smoker below 30°C (86°F) throughout every session. Above this point the fat begins to render and the texture of the bacon changes permanently. Use a thermometer placed in the smoker chamber, not just near the smoke source, and monitor it throughout.
Wood selection makes a significant difference. Beech is the classic European choice for bacon, producing a clean, neutral smoke that complements the pork without dominating it. Oak gives a stronger, earthier note. Apple and cherry produce a slightly sweet, fruity smoke that works particularly well with belly bacon and with brines that include maple syrup or brown sugar. Avoid all resinous softwoods, pine, spruce, fir and similar species produce an acrid, unpleasant smoke containing compounds that should not be ingested.
Sessions of 4 to 6 hours with overnight resting in the refrigerator between sessions allow the smoke to penetrate evenly and the flavour to mellow before you assess whether more is needed. One session produces a lightly smoked bacon. Two or three gives a more pronounced result. Smoke flavour intensifies during resting, so allow at least 24 hours after the final session before slicing and tasting.
Slicing and Storage
Rest the finished bacon in the refrigerator for at least one full day before slicing. This firms the fat, settles the flavour and makes the bacon significantly easier to slice cleanly and evenly. If you have cold smoked the bacon, 24 hours of resting after the final session is strongly recommended before you assess the flavour, it will continue to develop and mellow during this time.
Slice against the grain where possible. For streaky belly, this typically means slicing across the shortest dimension of the piece. A sharp knife or a slicing machine gives the most consistent results.
Always label your bacon with the batch name, the cut, and the date it came out of the brine. When a batch is exactly right, you will want to be able to repeat it precisely, which is exactly what the Production Log tab in the Excel download is for.
Extended Health and Safety Disclaimer
This calculator is provided as a general educational tool to assist with equilibrium curing calculations. It is not a substitute for food safety training, technical expertise or professional advice. Meat curing carries inherent risks, including spoilage, pathogen growth, incorrect curing salt use, and serious foodborne illness, if the process is not carried out correctly.
By using this calculator, you acknowledge that you are solely responsible for how you apply the information and results it produces. You must independently confirm that your ingredients, curing salts, nitrite percentages, measurements, temperatures, handling methods, packaging, equipment and storage conditions are all accurate and appropriate for your specific intended use.
Always use a precision scale. Follow strict hygiene and sanitation practices throughout. Keep meat under safe refrigeration at all times during the curing process. Never use pure nitrite or pure nitrate directly, only use approved curing premixes, and always confirm their exact composition from the manufacturer’s label before calculating or applying any cure.
Any curing time shown by this calculator is an estimate only. Actual curing time may vary depending on the thickness, shape, density, fat content, temperature control, bag sealing and other variables specific to your cut and your environment. Cure penetration, product condition and safety must always be assessed before the meat is removed from cure, dried, smoked, cooked or consumed.
Food safety laws, permitted practices and allowable nitrite limits vary by country and region. It is your responsibility to ensure that your curing process complies with the applicable laws, standards and food safety guidance where you live and work.
The Curesmith makes no warranties or guarantees regarding the safety, completeness, accuracy, legal compliance or final outcome of any product made using this calculator, and accepts no liability for any illness, injury, loss, damage or adverse result arising from its use or reliance on its output.
If you are unsure at any stage, do not proceed. Reach out to us directly at connect@thecuresmith.com and we will do our best to help.
Where to go next